


Maybe you want to avoid burning up a bunch of cash on Databricks, the cloud-based Spark machine learning and analytics platform. Or maybe you need a data source or language it doesn't support. Or maybe you're just more of an open source or roll-your-own kinda person? Enter Apache Zeppelin. It won InfoWorld Bossie awards in 2015 and in 2016.
Zeppelin has a lot of capabilities. It is a multi-user, multilanguage, multiplatform notebook for analytics and visualization. With Zeppelin, you can pull data from multiple sources (like Oracle, Solr, and MongoDB) and analyze them with tools like Apache Spark. You can write some of your code in Scala, some in R, and some in Python (among others) and then visualize the results with pretty charts and stuff.
Zeppelin isn't difficult to install, but if you want to get it running for multiple users on Amazon Web Services, you have to do a few steps. If you haven't used AWS’s EC2 before check out my EC2 tutorial for Linux and EC2 tutorial for Windows. You can install Zeppelin on Windows or Linux, but I suggest you use Linux because it is a tad lighter weight, and you will find more community documentation.
Without further ado, let's get started!
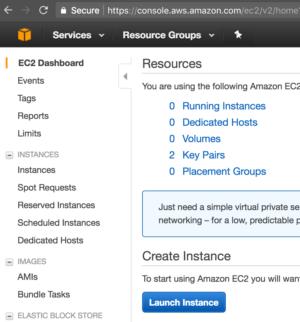
Step 1: Launch a new instance
You do this in the AWS EC2 console.
 IDG
IDGFrom the selection screen, choose the Ubuntu 16.04 LTS type (or the current equivalent).
Step 2: Choose and specify an instance type
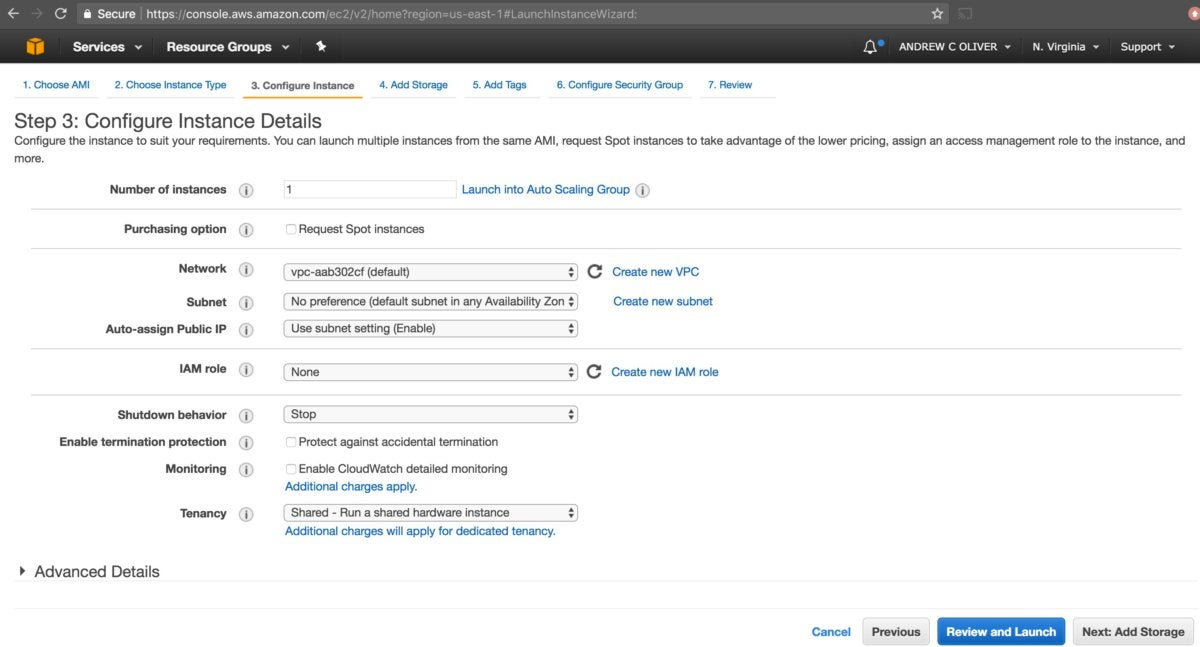
Now, choose an instance type. You probably need at least the 4GB (t2.medium) instance type for Zeppelin to run, but I'd select at least the 8GB (t2.large) instance. Neither of these are free, so get your pocketbook ready. Click Configure Instance Details after you select a type.
 IDG
IDGAs far as the instance details screen goes, ensure you have a public IP address but pretty much everything else can be left as is. Then click Add Storage.
 IDG
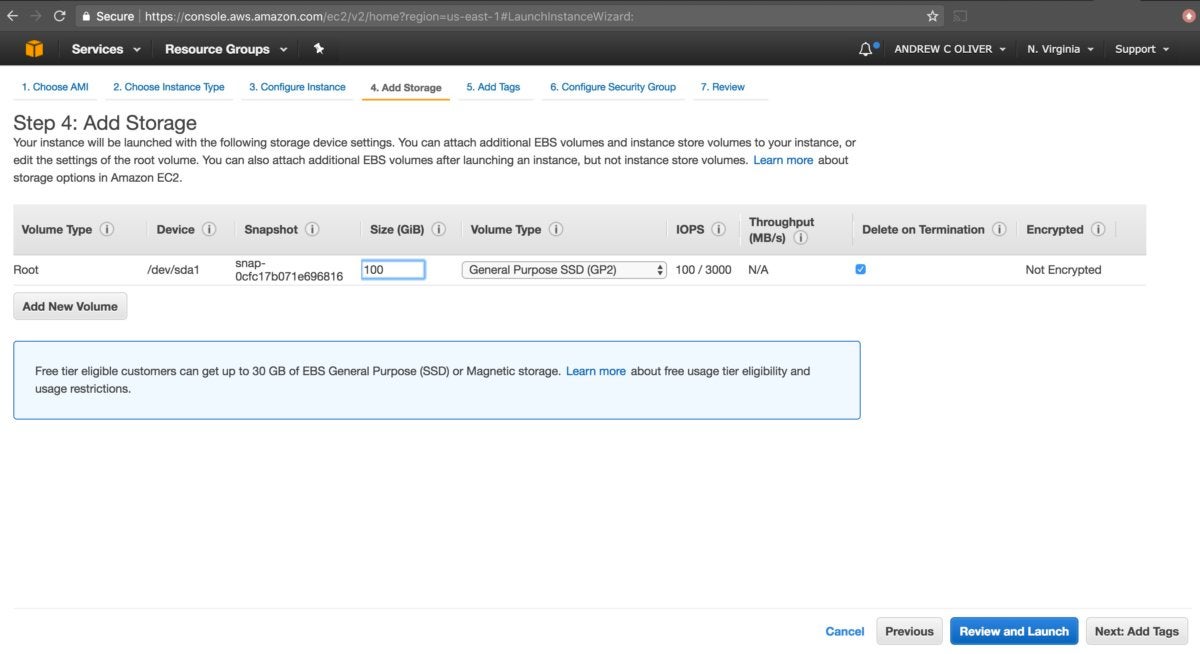
IDGNow, specify the storage size. The size is up to you. I'd go for 10GB minimum. My installation alone used about 4GB total, but considering logs or doing anything at all you should have at least twice that. If you're actually planning to use this instance, you'll probably need more than 10GB. I used 100GB. Again, this all costs money.
 IDG
IDGUnless you have some pressing reason to add tags, click Review and Launch.
 IDG
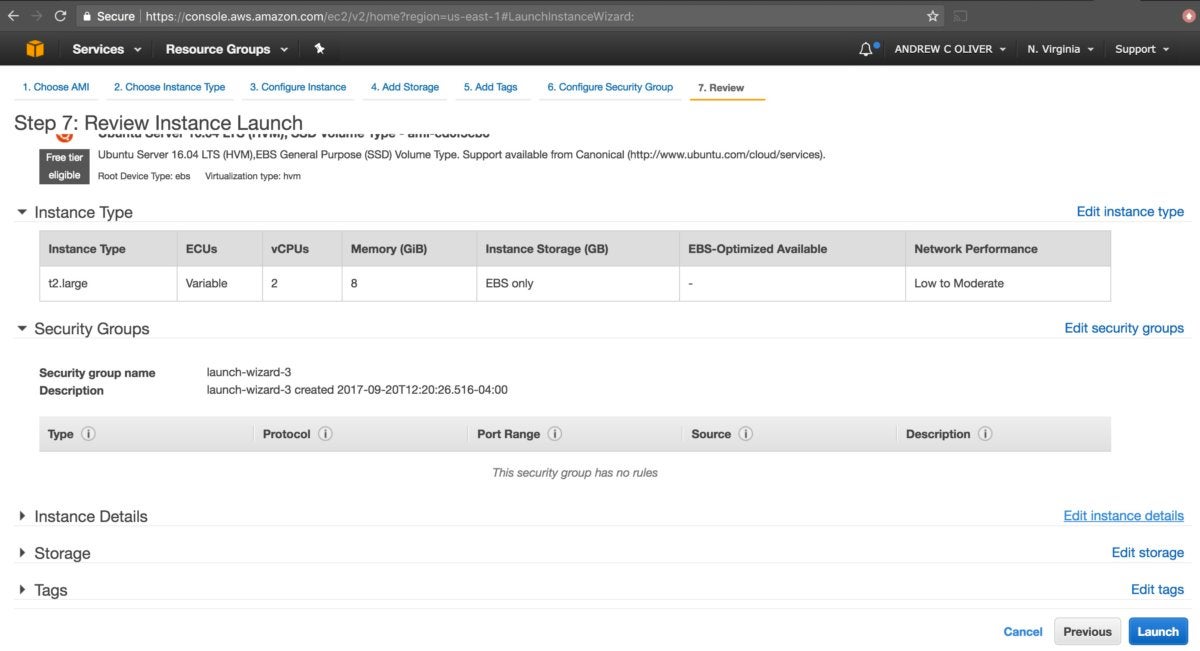
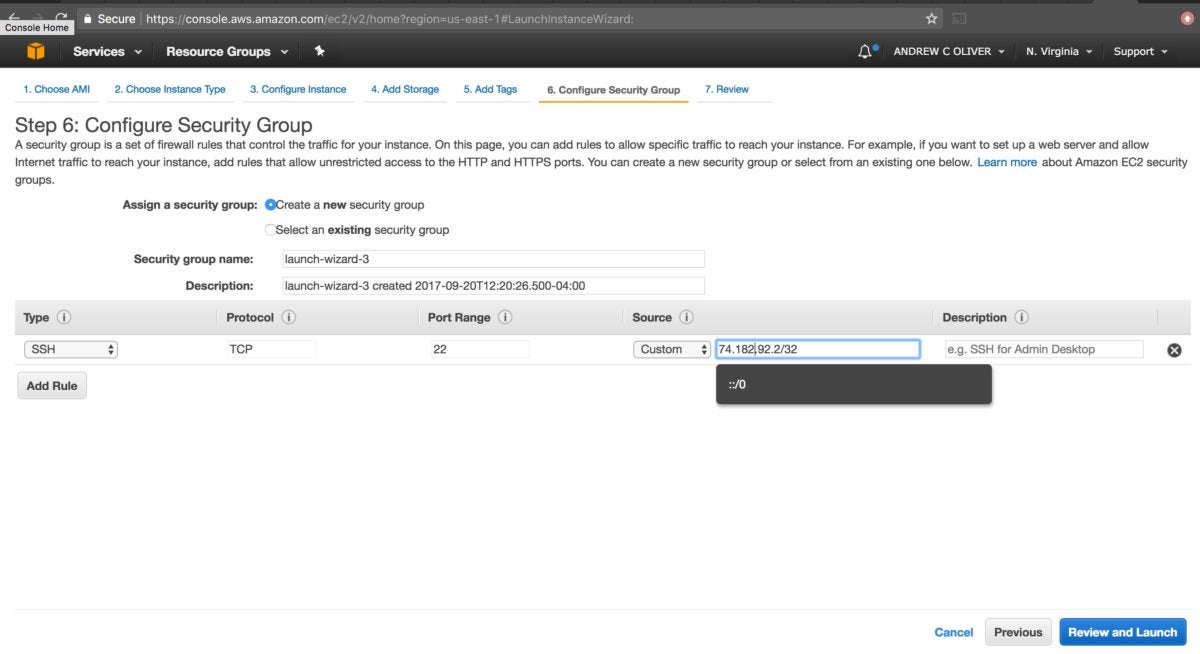
IDGStep 3: Edit your security settings
On the review screen, click Edit Security Groups so you can ensure you have network access—and no one else does.
In the Google Chrome browser, enter what is my IP and press Enter, and use that address followed by /32 for the SSH source. So if your IP address is 74.182.92.2, type 74.182.92.2/32. You should also add a rule for port 8080 and add the same source. That will let you both SSH to the instance and access Zeppelin.
 IDG
IDGAfter that, click Review and Launch.
Step 4: Set up SSH permissions and access
Once you launch the instance you'll need to create an SSH key. If you have an existing .pem file, use it. If not, create one called zeppelin and download it. You'll need this file, so do not lose it. After you download it or select an existing key, click Launch Instances.
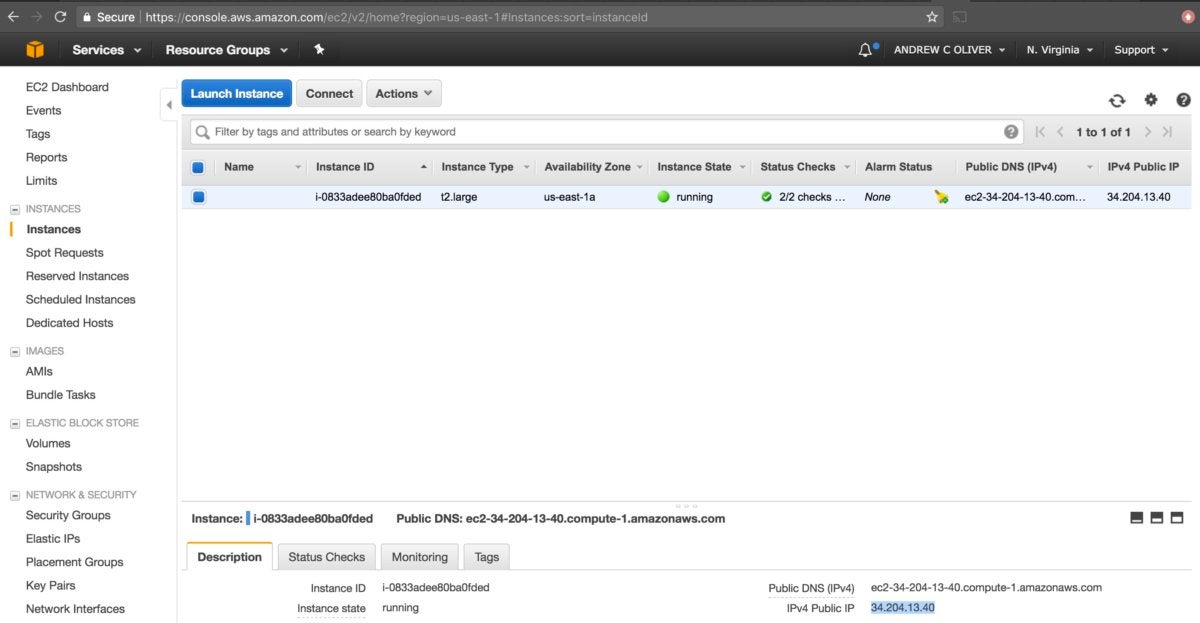
Wait until your instance starts, then note its public IP address.
 IDG
IDGNow, change permission of your .pem file. From the Terminal in MacOS or Linux, type chmod 600 zeppelin.pem from the directory you saved your pem in. In Windows, it will depend on your SSH client as to whether you need to do anything. Basically the file should be readable by your user only.
Using SSH from the command line or a tool like Putty, SSH to your instance. In MacOS or Linux, use the Terminal to:
- Enter
ssh -i zeppelin.pem ubuntu@yourinstanceip. - Create a new user called "zeppelin" on your instance. Type
sudo adduser zeppelin. - Install Java JDK 8 as the superuser.Type
sudo apt-getupdate and press Return, then typesudo apt-get install default-jdkand press Return. - Change to the Zeppelin user. Type
sudo su - zeppelin.
Step 5: Install Zeppelin
Using your browser, go to https://zeppelin.apache.org/download.html and click Binary Package with All Interpreters, which at this writing is zeppelin-0.7.2-bin-all.tgz.
Now, copy the link under your suggested mirror.
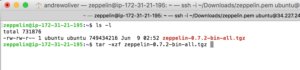
Back in the Terminal where you SSHed to your instance, use wget to get a copy of Zeppelin: enter wget followed by the link you copied, and press Return. (You'll be doing this as the "zeppelin" user if you've been following directions.)
After it downloads, untar Zeppelin. The command is tar -xzf zeppelin-0.7.2-bin-all.tgz, then press Return. (Your filename may be different if a new version has come out.)
 IDG
IDGNow, create a softlink called zeppelin-current. Type ls -l and press Return to see what the unarchived directory is called. Type ln -s yourdirectoryname zeppelin-current to create the softlink. For me, this is ln -s zeppelin-0.7.2-bin-all zeppelin-current.
Change directory to the zeppelin-current directory. Type cd zeppelin-current and press Return.
Now start Zeppelin. Type bin/zeppelin-daemon.sh start and press Return.
Test that you can reach Zeppelin.From your browser, go to http://yourinstanceip:8080/zeppelin. You should see the welcome screen. If so, you've installed Zeppelin and didn't misconfigure the EC2 security groups!
Step 6: Set up Zeppelin authentication
However, you're currently a very powerful anonymous user. So enable authentication/multi-user.
To do so, stop Zeppelin. In the Terminal, type bin/zeppelin-daemon.sh stop and press Return.
To secure Zeppelin, first copy the Apache Shiro (which is used for security) configuration template by typing cp conf/shiro.ini.template conf/shiro.ini and pressing Return. Then copy the site configuration by typing cp conf/zeppelin-site.xml.template conf/zeppelin-site.xml and editing it.
Your choice of editor is a big deal. If you're an experienced Linux user like me, you'll use the really great VI editor by typing vi conf/zeppelin-site.xml and pressing Return in your instance. (Exit VI by pressing Esc.) If you're new, you can use another editor called Nano by typing nano conf/zeppelin-site.xml and pressing Return. (Exit Nano by pressing Control-X.) My examples use VI, but you can replace vi with nano if you prefer Nano.
Now, disable anonymous access.From the editor, change the zeppelin.anonymous.allowed property to false.
 IDG
IDGConsider making all notebooks private by default.To do this, change the zeppelin.notebook.public property to false.
 IDG
IDGSave zeppelin-site.xml and exit the editor. In VI, this means pressing Esc and typing :wq. In Nano, this means pressing Control-X and telling it you want to save when prompted.
Now, exit to the Ubuntu user. Earlier, you did sudo su - zeppelin to change to the zeppelin user. Now you want out, so type exit and press Return.
Create a startup configuration for Zeppelin. You want Zeppelin to be managed by Systemd so you can type sudo service zeppelin start or sudo service zeppelin stop and also have Zeppelin start when you start your EC2 instance. Type sudo vi /etc/systemd/system/zeppelin.service and add the following content:
[Unit]
Description=Service to run Zeppelin Daemon
Documentation=
[Service]
User=zeppelin
Group=zeppelin
Type=forking
WorkingDirectory=/home/zeppelin
ExecStart=/home/zeppelin/zeppelin-current/bin/zeppelin-daemon.sh start
ExecStop=/home/zeppelin/zeppelin-current/bin/zeppelin-daemon.sh stop
[Install]
WantedBy=multi-user.target
Then save and exit the editor.
Now you can enable the startup configuration.To do so, first ensure the configuration is loaded by typing sudo systemctl daemon-reload and pressing Return. You'll need to do that any time you change the zeppelin.service file.
Next, enable the service to run at startup by typing sudo systemctl enable zeppelin and pressing Return.
Step 7: Start Zeppelin
You can now start Zeppelin. Start Zeppelin as a daemon by typing sudo service zeppelin start and pressing Return. Wait a minute or two.
Go to Zeppelin again by entering http://yourinstanceip:8080/zeppelin in your browser. When Zeppelin’s welcome screen appears, click Login. Log in with admin as your username and password1 as your password.
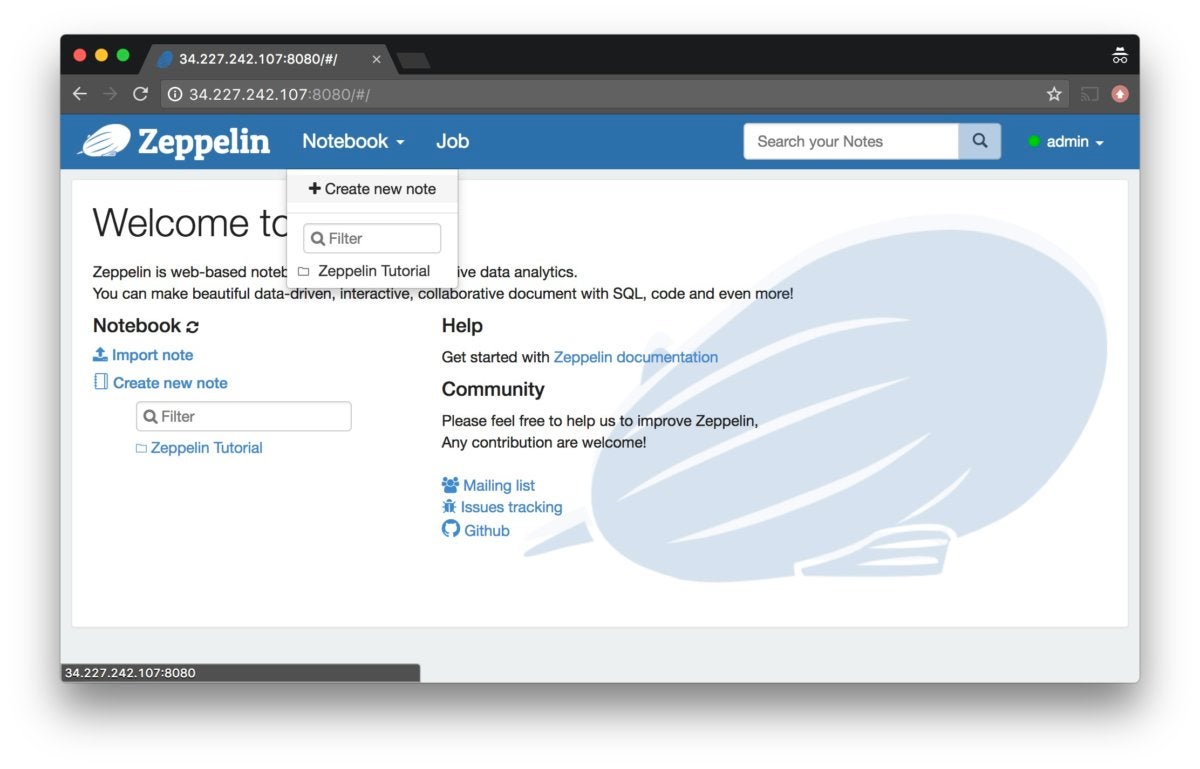
Step 8: Create a new notebook
To create a new notebook, choose Notebook > Create New Note from the menu at the top of the welcome screen. For this example, call your notebook "Spark Notebook."
 IDG
IDGNow that you have a notebook, use it! Apache has a good Zeppelin tutorial that I recommend you try out.
When done, shut down your instance in EC2. (Save your money!)
 IDG
IDGNext steps for using Zeppelin
Now that you have Zeppelin up and running, here are some of the things you may want to do with it:
- You may want to restart your instance and make sure that Zeppelin starts with the instance. If it doesn't, type
journalctl -xeand press Return in the Terminal to see what went wrong. - You might want to change the passwords, users or roles by editing
conf/shiro.iniin thezeppelin-currentdirectory. - You may want to check on the tutorial on how to secure a particular notebook.
- Right now, you're using plaintext users and passwords stored in
shiro.ini. If you have an LDAP server or some other authentication source, you could configure that realm instead. - You might want to enable SSL. You'll want a domain name for your server, which means getting a fixed Elastic IP for it as well.
- If you do have multiple users, you need to configure the EC2 security group with either their IP address or a range of IP addresses (check out my EC2 tutorial for an explanation on how to do this).