


Every developer needs to be on GitHub, whether or not they contribute to open source, and whether or not they have repositories (repos) hosted elsewhere. Seriously.
In this day and age no developer should have to justify using open source projects. Further, as a developer you absolutely need to read the code for any open source projects that you use; track issues and changes to the projects; and post issues when you encounter them so that they can be fixed. If you can contribute code fixes, improved documentation, and/or code enhancements back to the community, even better.
Considering GitHub.com hosts the vast majority of open source repositories, you owe it to yourself to know how to use it. In this tutorial, you’ll learn how to perform the basic operations of “GitHub Flow” in a non-destructive way. These operations are essentially the same whether you are a developer, a technical writer, or a tester.
Set up a GitHub account
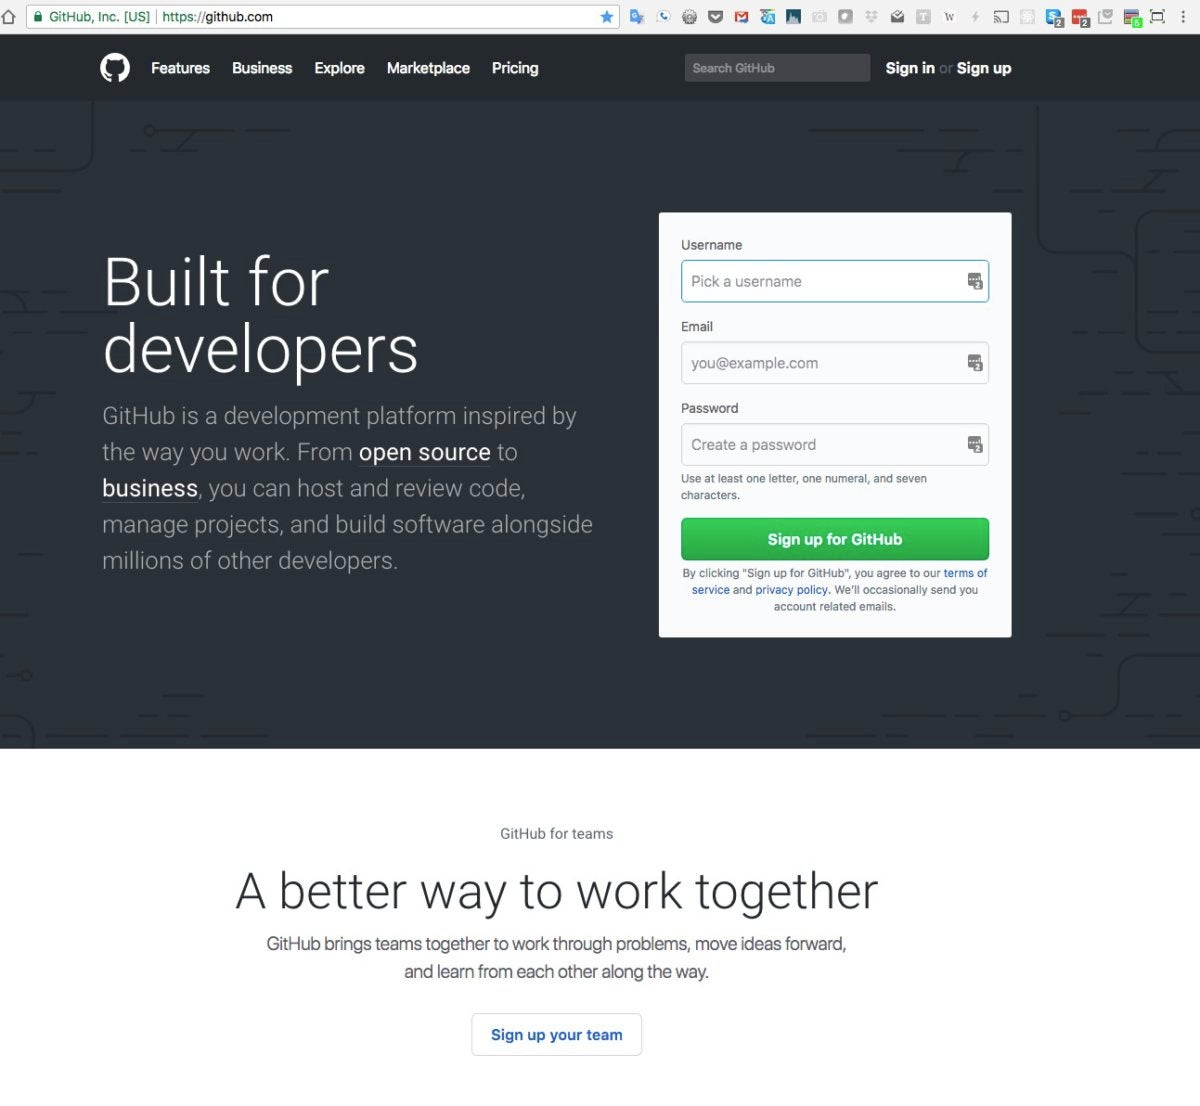
If you’re not already a GitHub user, you need to sign up for an account. The form that appears on GitHub.com when you’re not signed in, shown above, gives you the opportunity to create a username and password and associate them with your email address. A free account gives you the opportunity to work on other people’s projects and create your own public repos. To create your own private repos, you need to upgrade to a paid subscription, unless you are a verified student, teacher, or academic researcher.
 IDG
IDGFor the purposes of this tutorial, a free account is all you need. You won’t need to protect your “Hello, World!” code from prying eyes.
You’ll need to take a few additional steps to verify and secure your account. First verify your email address; that’s pretty much mandatory. If you’re not in a hurry, add a profile picture, secure your account with two-factor authentication (2fa), and fill out your biography.
Install Git
If you have a Windows or MacOS computer for development, one easy way to synch your desktop Git repos with GitHub repos is to install and use the GitHub Desktop GUI. You can also use the Git command line, available on pretty much every operating system, or a Git GUI.
To test whether Git is already installed in your command shell, try the following command line:
$ git --versiongit version 2.8.1
If instead of the version number you see an error message, or if the version displayed is seriously out of date, browse to https://git-scm.com/downloads (shown below), then download and run the current Git installer for your system. (On my MacOS system, that upgraded Git to version 2.15.1.)
On a Windows 10 system, you may also want to install Git in your Linux Bash shell, if you have Windows Subsystem for Linux installed and use it. On my Windows 10 system with an Ubuntu Bash shell, installing Git required updating APT (sudo apt-get update) and then running sudo apt-get install git to install Git.
By the way, even if you do have GitHub Desktop or another Git GUI installed, there will be occasions when you will need to use Git from the command line, either to fix an issue or as part of a script. You might want to install Git now and make sure it’s working, rather than wait until you get into a difficult situation with a repo.
 IDG
IDGCreate a new repository on GitHub
At this point, let’s follow the GitHub “Hello, World!” tutorial. It starts by showing you how to create a repository using the GitHub web interface. At the top right of any GitHub page, just to the left of your profile picture (assuming you’ve created one), is a drop-down next to a plus sign. Click it, then choose “New repository,” as shown below.
 IDG
IDGThe following form will open. Fill it out in the same spirit as I did:
 IDG
IDGOnce you click on the green “Create repository” button you’ll see your repo with one branch, one commit, one watcher, and one contributor:
 IDG
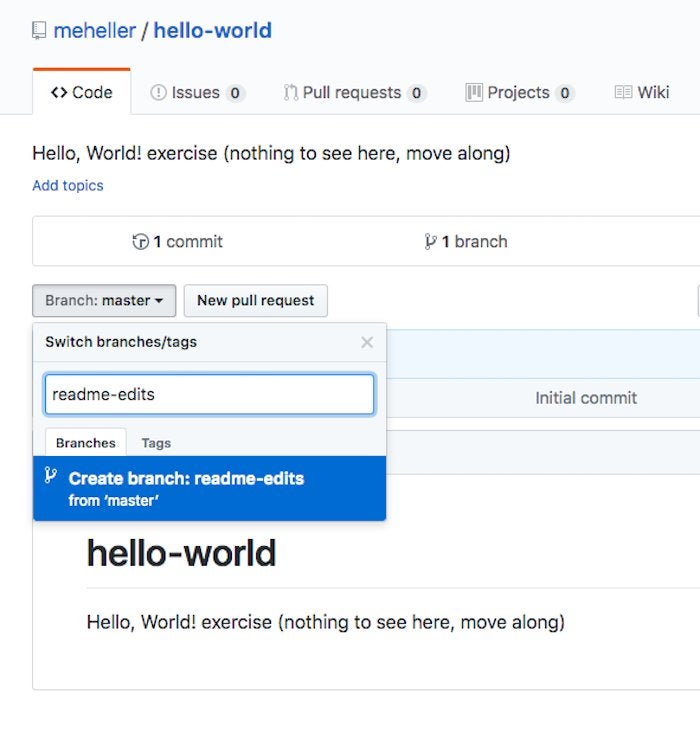
IDGCreate a new branch on GitHub
Rather than simply starting to edit a file in the repo, let’s create a new branch. The new branch is a snapshot of the base branch (master in this example) at a moment in time. You can make changes to the new branch without affecting the base branch, until you merge the branches. In the screenshot below, you can see how I’ve dropped down the branch menu and typed in a new branch name, readme-edits.
 IDG
IDGOnce you have pressed the blue “Create branch” button, the master branch will be copied to the new readme-edits branch, and you will be switched to the new branch.
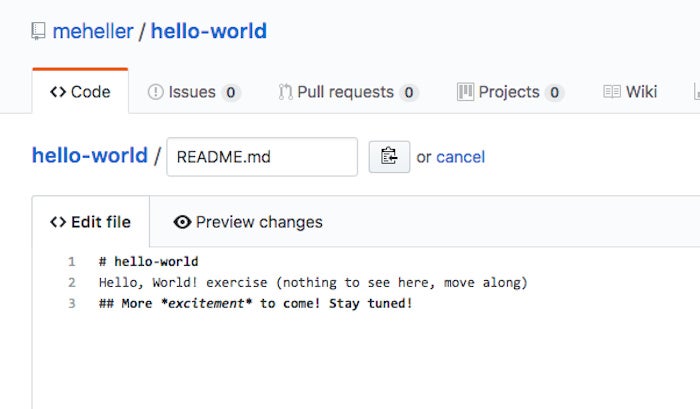
Commit changes to your GitHub repository
Now you’re free to commit changes in the new branch without breaking anything in the master branch. Click on the blue link at the left for README.md, click on the pencil at the upper right of the file’s frame, and edit the README text. Note that .md files on GitHub support a special version of the Markdown language, unsurprisingly called GitHub Flavored Markdown.
The GitHub tutorial suggests writing something about yourself. I’d suggest that you experiment with Markdown using GitHub’s Mastering Markdown page, Adam Pritchard’s Markdown Cheatsheet, and the links given on both pages. You’ll notice that there is a “Preview changes” tab that you can use to see the final display before committing your changes.
 IDG
IDG—
 IDG
IDGYou can commit your changes from either pane. Make sure to make your commit comment a good description of what you’ve done. Mine is “Added teaser to README.”
Leave the selection on “Commit directly…” and click on the green “Commit changes” button when you’re ready. If you go back to the top-level repository (click on the blue hello-world link) you’ll see your commit shown. You can switch back and forth between the master branch and the readme-edits branch to see your README changes and compare them visually. From the readme-edits branch you can click on the commit comment to open a side-by-side source code view:
 IDG
IDGYou could add a comment on the commit at the bottom of the page if you wish. That’s one good mechanism for documenting code reviews.
Open a pull request for your GitHub repo
Now that you have changes in a branch off master, you can open a pull request. When you open a pull request, you’re proposing your changes and requesting that someone review and pull in your contribution and merge them into their branch.
For this particular edit, a pull request sent to your own project does seem like overkill. There’s a point to doing it, however: You should learn how to submit pull requests so that you can send them to other people’s repos. As you’ll discover, submitting a pull request (PR) is the way you can contribute to open source projects that have a small number of committers.
On the main repo page, you should see a helpful note showing your recently pushed branches. Push means here that the branch was added to the GitHub repo. In a scenario where you make the changes locally first, committing to your local repo and pushing to the upstream repo (e.g. on GitHub) are often separate steps.
 IDG
IDGIf you press the grey “New pull request” button, you’ll be able to choose your source and destination—try it and preview the UI, but don’t follow through.
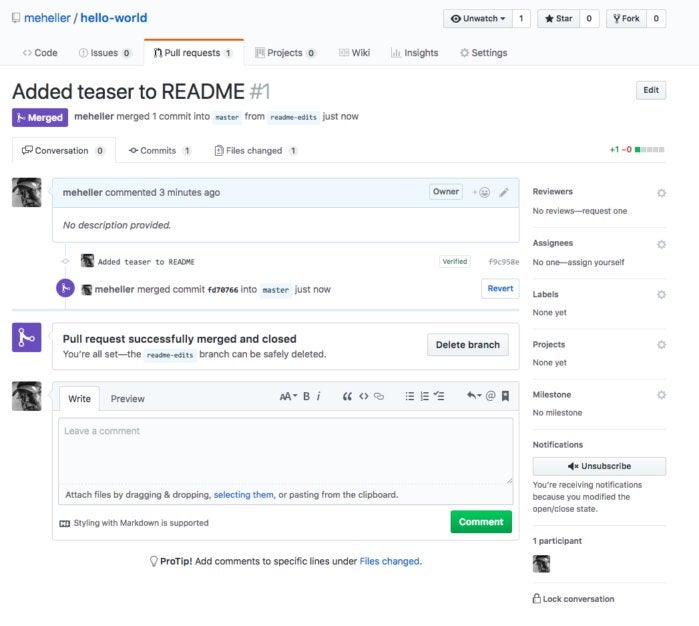
Merge a pull request into your master branch
Now let’s perform the merge. Returning to the main repo page, click the green “Compare & pull request” button. This time the exact pull request you want to submit will come up. Feel free to add comments or clarify the request name (initially populated from the commit names) before sending the pull request with the green “Create pull request” button. On the intermediate page, when told that the request has no conflicts, press the green “Merge pull request” button.
 IDG
IDGOnce that is done, feel free to delete the successfully merged branch, using the button to the right of the purple icon.
 IDG
IDGIn Git, branches can come and go all the time. If you’re working on a real project, consider adding a branch every time you start working on a feature, and deleting the working branch once it has been successfully merged into a production branch.
Clone a GitHub repo to your local machine
In real life people mostly write code and documentation on their own machines, not directly online. To see how you can do that in a GitHub workflow, let’s clone the hello-world repo. On your GitHub page, go to the code pane of the hello-world repo, and click on the green “Clone or download” button. We don’t want to download a Zip; instead, we want to clone the repo with Git or GitHub Desktop.
 IDG
IDGIf you installed GitHub Desktop, click on “Open in Desktop.” If not, click on the copy icon to the right of the URL for your repo and paste the URL into a console after the command git clone. Either procedure will create a Git repo on your computer. Your GitHub Desktop would look something like the image below once the clone finished:
 IDG
IDGThe command-line version of the clone operation would look something like this:
 IDG
IDGPush a commit to your GitHub repository
Now that you have a local repo, you can edit and commit locally, then push the commits to GitHub. If you used the command line, cd into hello-world and edit README.md with your favorite text editor, preferably one with Markdown support. If you used GitHub Desktop, right-click on the hello-world repo and click on your preferred option. On my machine, the context menu looks like this:
 IDG
IDGI opened the repo in Atom, a free editor from GitHub. Then I added a line to README.md and previewed it:
 IDG
IDGAfter saving the file, GitHub Desktop shows that the repo has one uncommitted change:
 IDG
IDGOnce I filled in the commit summary at the lower left and pressed “Commit and Sync master” the change was committed locally and pushed to GitHub. After a browser refresh, the GitHub repo now looks like this:
 IDG
IDGWelcome to distributed development!
Could we have done this change on a branch? Yes, easily. In GitHub Desktop the “Add a branch” button is an icon just to the left of the branch dropdown at the top left.
Fork a GitHub repo
We could also have made the change in a forked repo. From the GitHub page for the repo, you can click the Fork button at the top to easily take a snapshot of your repo. That doesn’t make a lot of sense if you already have commit privilege to the repo, but it makes plenty of sense if you want to contribute to someone else’s open source project.
For example, I was doing an exercise to learn Jenkins Blue Ocean; one of the steps was to clone the creating-a-pipeline-in-blue-ocean repo from jenkins-docs. That gave me my own editable copy of the repo, to which I could commit changes (generated by Blue Ocean) as directed by the tutorial.
 IDG
IDGOnce you’ve got a forked repo, not only can you treat it as your own, but you can also apply later commits from the upstream repo from which you created the fork, and submit pull requests back to the upstream repo. That’s a typical workflow to follow when you are contributing to an open source project.
Welcome to distributed development with open source!