


Any organization making use of the cloud will want to leverage the power of infrastructure automation. This holds true whether you’re tapping Amazon Web Serices, Microsoft Azure, or any other cloud service. Automating repetitively executed tasks will save considerable labor and reduce human error.
Organizations already on Azure know that Microsoft’s cloud service allows you to forget about much of the underlying infrastructure. But it's up to you, as an Azure admin, to take what Azure offers and tailor it to your needs. Here, automation techniques are key.
There are two high-level ways to implement infrastructure automation techniques in Azure: by using Azure's "automation in the cloud" service called Azure Automation or by using the scripting language of your choice to control various Azure services. For many Microsoft admins, this means Windows PowerShell, so while automation techniques can be applied using any number of scripting languages, here we'll focus on PowerShell.
To help get you familiar with Automation in Azure, we'll highlight three common admin tasks to which you might not have yet considered applying automation techniques:
- Provision Windows virtual machines
- Remove virtual machines (and associated resources)
- Create Azure Dev-Test Labs
Although these only scratch the surface of the wealth of automation opportunities you have in Azure, they will give you an in-depth understanding of what you can do in applying scripting techniques to Microsoft Azure and the services Azure offers.
[Note: Microsoft provides a service called Automation, which is essentially Windows PowerShell and Desired State Configuration (DSC) hosted in the cloud. The PowerShell code shown below could theoretically be used on-premises or through Automation runbooks. We'll cover how to use Automation to accomplish one task, but know that even if Automation runbooks aren't explicitly covered, chances are the code and techniques can be applied to runbooks as well.]
Setting up
To perform the tasks highlighted in this article, a few prerequisites apply. First, you’ll need a Microsoft Azure subscription, of course, and a Windows PC with PowerShell v4 or later, as we'll be building PowerShell scripts to kick off some Azure automation techniques. You will also need appropriate permissions in Azure. Security is essential in the cloud, but for the purposes of this article, I won’t focus on security. Instead, I'll use a full administrator account over my subscription. If you aren't a full administrator, your results may vary from mine.
If needed, additional requirements specific to the tasks below will be noted as we go.
Provisioning Windows virtual machines
Many organizations tap Azure as an IaaS, which essentially means virtual machines in the cloud. If you’re hosting VMs on Azure, Windows VM provisioning becomes an everyday task. You could use the Azure portal to manually build each Windows VM by hand, but automation will save you a lot of frustration and wasted time.
To automate Windows VM provisioning, we’ll use Azure Automation runbooks (snippets of PowerShell code), but first we'll need to perform a few one-time tasks: We’ll set up an Automation account and create an Automation asset in the form of a credential for authenticating your Azure subscription inside an Automation runbook.
To create an Automation account, we run a single PowerShell command:
New-AzureRmAutomationAccount -ResourceGroupName adbdemoresourcegroup -Name demoacct -Location 'East US 2'
The above command creates an Automation account (demoacct) for an existing resource group (adbdemoresourcegroup) and places this account in the East US 2 data center. (Note: You need to have an existing resource group to create an Automation account.)
With our Automation account set up, we then need to create an Automation asset. Assets are items that may need to be referenced from the runbook code itself. We must create a Credential asset to authenticate to our subscription inside of the runbook. To do this, we use PowerShell again:
New-AzureRmAutomationCredential -Name 'Full Administrator' -Description 'To authenticate to my Azure subscription' -Value (Get-Credential) -ResourceGroupName adbdemoresourcegroup -AutomationAccountName demoacct
Here you can see that I'm specifying the Automation account I created (demoacct), along with other parameters necessary for creating the credential. You will then be prompted for a username and password where you'd provide the credential to your Azure subscription you'd like to use.
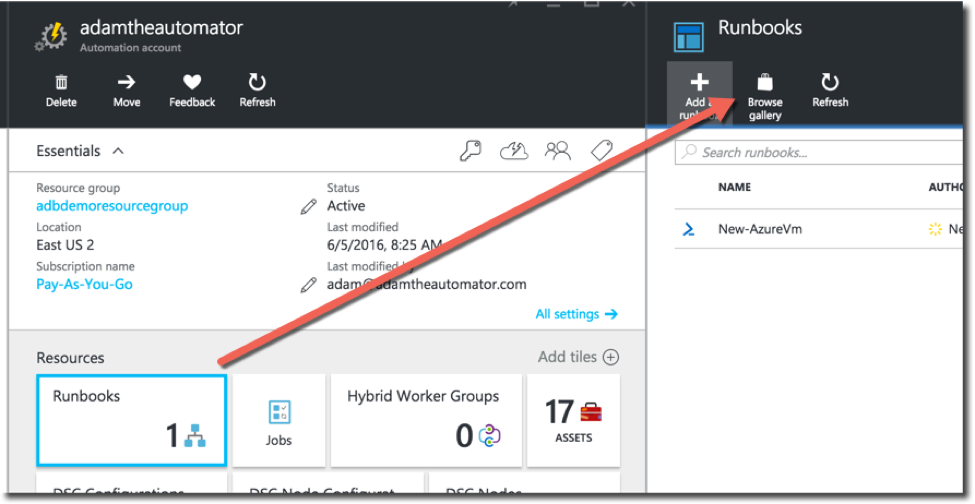
With our newly created Automation account and credential, we can now provision a virtual machine via an Automation runbook. But first, we need to either create a runbook or find an existing one. Previously created runbooks for a variety of tasks are readily available to you from within Azure. To find them, go to the Azure portal, select Automation Accounts, choose the Automation account we built, select Runbooks, and then Browse Gallery as shown below.
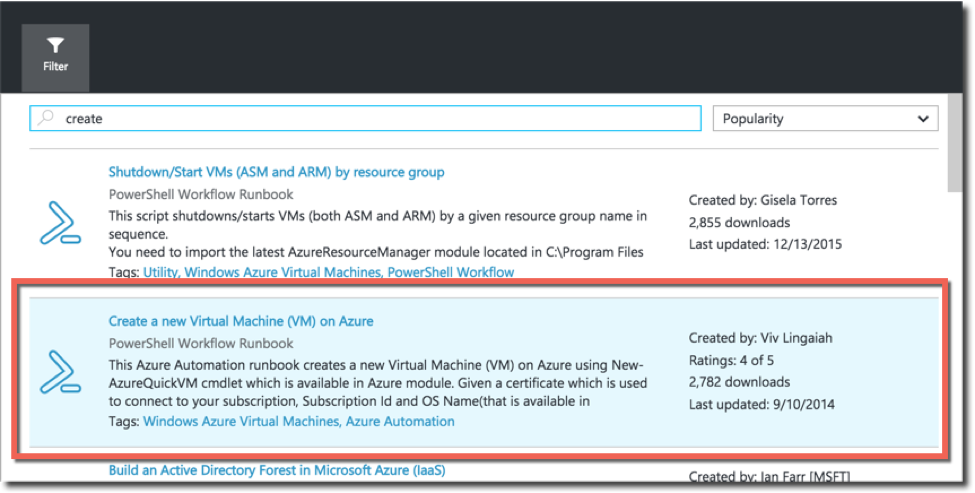
This will display all of the runbooks that both Microsoft and the community has built. For our purposes, I'll filter for runbooks that include the word “create” and choose one that was set up by a member of the community as shown in the screen below.
Click the runbook, select Import, give your new runbook a name, and click OK to import the runbook into your subscription.
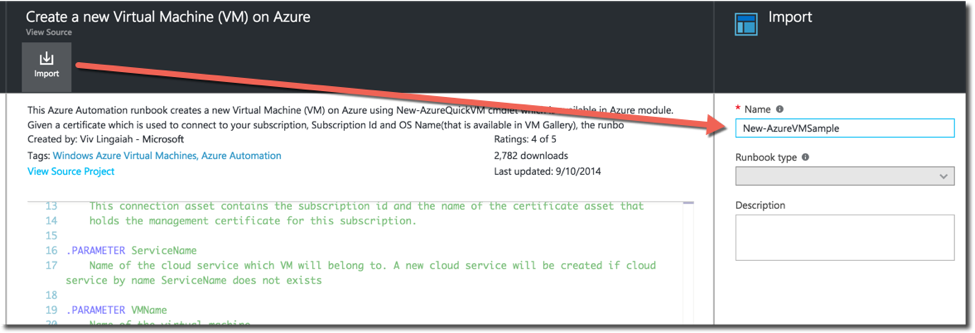
Once the runbook is imported, you'll then be able to edit and tweak its parameters to match your environment. Kick off the script, in this case New-AzureVMSample, either from PowerShell or within another script, and you'll have an Azure VM.
Removing virtual machines (and related objects)
The first task above gave us a taste of what can be done with Azure Automation and runbooks. Take a look into that VM provisioning runbook, and you’ll see it’s primarily PowerShell code. Most if not all of your Azure on Windows automation tasks will be done in PowerShell. And as I alluded earlier, the code we'll cover can be run as successfully on your local computer or in an Automation runbook.
Next, we’ll tackle the removal of VMs. Why would you want to automate this? Can't VMs be deleted as quickly as right-clicking the VM in the Azure portal and selecting Remove? Yes. But there's a catch. When a VM is removed this way, it doesn't remove everything associated with it. You may have storage containers, VHDs, and other resources that were created to work with the VM, but these objects will be left behind when you remove VMs manually.
So let's automate VM removals with PowerShell to ensure all resources related to that VM are removed along with it. This will include the VM, the boot diagnostics disk, the OS disk, the status blob, and any data disks attached to the VM.
Because this is no easy feat, rather than covering step-by-step instructions here, I've built a function for you to use to make all of this happen at once. You can download this function via GitHub and use it by running the following commands from PowerShell on your local machine:
## "Dot source"the downloaded script's function
. '<PathToRemove-AzrVirtualMachine.ps1>'
## Authenticate to your Azure subscriptionLogin-AzureRmAccount
## Find all of the VMs (and related resources) you'd like to remove.
## Here I'll find all VMs in my subscription that have SQL in the name$VmsToRemove = Get-AzureRmVM | where { $_.Name –match 'SQL' }## Pipe the VMs to theRemove-AzrVirtualMachinefunction
## to instantly begin removals$VmsToRemove | Remove-AzrVirtualMachine -Verbose
This will create PowerShell background jobs that will remove the VMs in parallel, which means the removals will be performed much quicker.
To get the status of the removals, you may use the Get-Job cmdlet, and you will soon notice your VMs disappearing in the Azure portal.
Dev-Test Labs

If you're only passingly familiar with Azure, you may know you can host VMs. But did you know you can provision entire test environments as well? Azure provides a service called DevTest Labs. This is one of the best ways to automate provisioning whole sets of VMs for testing as well as controlling those environments as a single unit.
To get started, head to the Azure portal, select New and type DevTest Labs to filter through the list of services. This will bring you to the DevTest Labs screen, where you'll be presented with a couple options to create your lab.
Notice the Auto-shutdown option. This feature is available only on the DevTest Labs service, and it allows you to set a policy for when the VMs should be shut down. This will prevent you from having to build your own scripts to make this happen in Azure Automation, for example.
Once you click Create, your deployment will immediately start, and after a few minutes your lab will be set up and ready to go. You'll then have the opportunity to configure options like quotas for resource utilization, policies to ensure developers are only allowed to provision a particular number of VMs and which sizes, create templates to share among your team, and a lot more.
After you’ve configured your lab, you can begin to add VMs. Select your lab, click +Virtual Machine, and you will be presented with all of the prebuilt images available in Azure as you can see below.
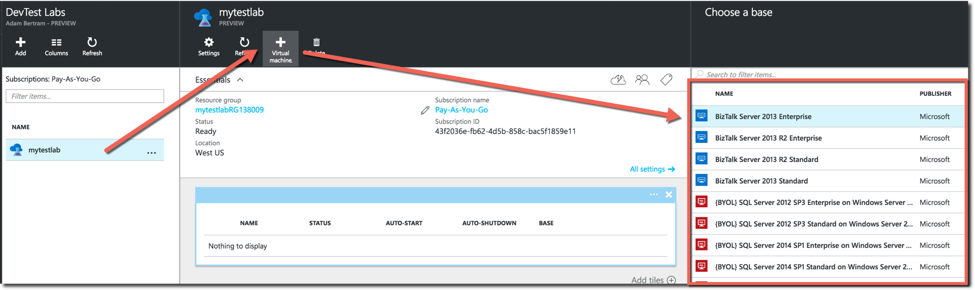
You can even use your own custom VHD images if your organization has specific configuration items that you'd like applied during your testing.
If you click on Settings, you'll notice a wide array of options you can choose from.

Notice you can not only add VMs to your labs but also manage costs, set various policies to control what gets added to your lab, and even create artifact repositories where you can integrate your DevTest lab with either GitHub or Visual Studio Team Services.
Summary
Microsoft Azure is a large set of services where automation shortcuts can be applied both via the Azure portal and via scripting languages like PowerShell. Because Azure has such an extensive set of APIs, in theory, nearly anything you'd like to do in Azure can be automated with enough know-how.
If you’re looking for more, head over to the Azure portal or brush up on the Azure PowerShell module to see what else can be automated. You never know. You might find there's a much better way of getting the grunt work done.