


GUIs are great—we wouldn’t want to live without them. But if you’re a Mac or Linux user and you want to get the most out of your operating system (and your keystrokes), you owe it to yourself to get acquainted with the Unix command line. Point-and-click is wonderful whenever you need to do something once or twice. But if you need to repeat that task many times, the command line is your savior.
The command line is a window into the full, awesome power of your computer. If you long to break free of the constraints of the GUI or think that programming or administering remote machines is in your future, then learning the Unix command line is definitely for you.
Don't worry if Unix commands seem like magical incantations or the mysterious internals of the system seem beyond your grasp. They aren't that difficult to learn, and this article will give you the 10 essential commands you need to get started. Before long those cryptic strings will be second nature.
Shell basics
The Unix command line shell is roughly equivalent to the command window in Microsoft Windows (cmd or PowerShell). The commands we walk through below will work on any Unix-like system, including Linux, Darwin (the foundation of MacOS), FreeBSD, and even Windows with something like Git Bash or the new Bash shell in Windows 10. The options and output vary slightly, but you should have no trouble making sense of them.
First, you must open a shell, sometimes called a terminal window. Often Unix distributions put this under the Administration or System menus. In MacOS, you’ll find the terminal in Applications > Utilities > Terminal. When you launch it, you'll see something like this:
 IDG
IDGThis screen, from MacOS 10.11, is typical of most shells in a GUI. At the top of the window we see the type of shell, in this case Bash (Bourne Again Shell, which is the default shell in MacOS and most Linux distributions), and the size of the window. Inside the window is the prompt, in this case configured to display the name of the machine (Mercury), the name of the current working directory (here the tilde, ~, which is shorthand for the user’s home directory), the name of the user, and finally the prompt symbol (the $). Note that your prompt will change as you move around the file system or if you become a different user on your machine (such as the root or superuser in order to run administrative commands). The prompt displays this information, so you can easily tell where and who you are on any machine.
It’s worth knowing there are two major flavors of the Unix shell: Bourne and C shell. Bourne and company were derived from the original AT&T Unix, while the C shell hails from the University of California at Berkeley and BSD Unix. Generally the Bourne and C shell derivatives are good for interactive work at the terminal. The POSIX standard shell, the Korn shell, is the one you'd want to use for writing your own programs in the shell, called scripts. We use the Bash shell for the examples in this tutorial.
The shell environment
One of the first facts to understand about working on the Unix command line is that the shell operates in its own environment. Understanding how to control the shell environment is an important part of becoming efficient at the command line. Let’s take a look at the environment using the env command:
 IDG
IDGDon't worry about understanding all of the environment variables now, but know that they're there. You should recognize a few variables already. For example, SHELL=/bin/bash tells us we're using the Bash shell. HOME=/Users/nunez specifies the location of the user’s home directory. You can change or create environment variables, and you will often do so. Here is an example of setting an environment variable called FOO and displaying its value:
 IDG
IDGAs you see, by convention we put variables in upper case. Take special note how we reference environment variables when we use them in commands, with the preceding $. The $ tells the command interpreter to use the variable’s value. Without the $, the echo command above would simply print the name of the variable, FOO.
Unix commands
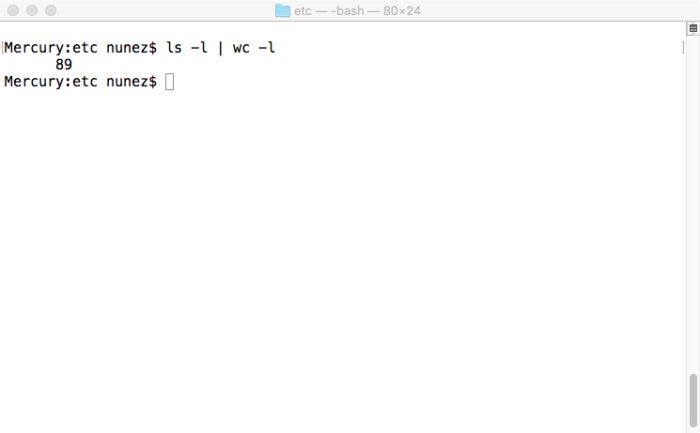
Regardless of which shell you use, whenever you type a command in the shell, you will cause a Unix program to execute. The Unix design philosophy is to create programs that do one thing well and to chain (or “pipe”) them together to do useful work. Let’s look at a simple example to count the number of files in the /etc directory (we’ll see how to move to the /etc directory later on):
 IDG
IDGThis command sequence illustrates two important concepts: piping and options. The ls command (equivalent to the dir command in Windows) displays the contents of a directory, and wc (word count) the number of words. Notice the vertical bar between them? That's the pipe character. The pipe takes the output of the first command and directs it as input to the second command. You can chain any number of commands together in Unix by connecting one to another with pipes.
The second thing to notice is the options given to each command. In Unix, options are traditionally prefixed with a single dash character, -. These command-line options change the behavior of the command. In this example, the -l option to ls means to output the directory contents in “long” format, while the –l option to wc means to count the “lines” instead of the words. In English this command might be read:
List the number of lines in the current directory and then send them to the word count program to count the number of lines.
Often these command-line options override defaults that are set in the environment. If you want to change the way the command behaves on a permanent basis, you can set the environment variable automatically when you log in. Many commands allow you to combine options in a single string—for example, ls -la—but others do not. You can learn about all of the options for a command by checking its manual or “man pages” (which we discuss below).
Learning and using command-line options is a big part of being efficient at the Unix command line. Some commands have so many options that the documentation runs to dozens of pages. Don't let that worry you now. You often need only a few options to perform a given task, and many options are used only when writing programs in the shell language.
The manual
Once you understand the basics of the command line and the environment, we can begin to dive deeper into the system. The first place to start is with the manual.
One of the nice aspects of Unix is the high quality of the documentation. There is documentation for users, system administrators, and software developers. You access the documentation with the man command. Let’s start by reading the manual for the manual (enter man man on the command line):
 IDG
IDGThe manuals are divided into eight sections, which vary slightly depending on whether you're on a BSD/Linux/Mac or System V type of Unix. It's helpful to start by reading the introduction to each section, and you can do this with an incantation like man -s 1 intro, which means to look in section 1 to find a manual page called “intro”:
 IDG
IDGIf you aren't sure of what command you're looking for, you can try the -f and -k options. man –f command will tell you a command’s function if you know its name, while man –k hint will list the names of relevant commands based on one or more keywords. Both options will search a built-in database (if it has been configured; it usually has) and return all matches. For example, man –k bzer will display the manual pages that start with the string bz:
 IDG
IDGThe file system
There are many commands related to the Unix file system, since it is core to the operating system. We saw one of them earlier: ls, which lists files in a directory:
 IDG
IDGThe ls command may be the most frequently used command of all, and it has many options to adjust its output. One option you will want to know about right away is ls -a (list all). This will reveal “dot” files (files or directories whose names begin with a dot or period), which are hidden by default. These files or directories typically contain configuration information or log files for the Unix system. The .bash_history file, for example, logs all the commands you enter on the command line.
 IDG
IDGThe other command you will need right away is the cd command, which you use to change directories. This is akin to the same command in Windows, but with an important difference. In Unix, all drives (devices) appear as a single drive. Whereas in Windows you might have your pictures on an external hard drive that appears as E:, in Unix that drive might be /home/user/pictures. All files on a Unix system are accessed via a path that starts with / (the root directory), and you can mount different hard drives at different points in the file system according to your needs.
Before you start wandering around the file system, let me introduce another command you’re going to need: pwd (print working directory). Because there are potentially many places to get lost in a growing file system, this commands lets you quickly determine where you are. Let’s switch directories to the location where system configuration files are kept and verify our location:
 IDG
IDGNote that you can use the cd command with no arguments to quickly return to your home directory. Another tip: The ~ can be used as a shortcut to refer to your home directory in both Bash and C shell.
At this point you know how to move around the file system and list the contents of directories. Now we need a way to read the files stored in them. These days most systems come with the less command for this. less will display a file page by page and allow you to navigate using Vi commands (press j to move down, k to move up, h to get help, and q to exit the file).
Let’s see what is in our /etc/passwd file by entering less /etc/passwd:
 IDG
IDGThe passwd file lists the user accounts on a Unix system, along with their user and group ID numbers, their home directory, and the path to the corresponding command or shell. On MacOS, however, you’ll find only system service accounts in passwd. That’s because human users are configured under Users & Groups in MacOS’s System Preferences.
Disk space
Running out of disk space is a gradual process that might take years, but can still catch you off guard. There are two commands you can use to check your free space and determine which files are hogging your disk: du (disk usage) and df (disk free). They both take a -h option (human readable). To get a sense of how full your disk is, use the df command:
 IDG
IDGFor now, focus on the %iused and mounted on columns. This shows that my home directory is 92 percent full, so I should probably clean it up. But how do I know where all the space is being used? That’s what du is for:
 IDG
IDGFor this example, I went with an incantation that limits the output to the first 10 lines. Otherwise du will list every directory on the machine, which could easily be too much to grasp. From this listing you can see how much space is consumed by each directory. You might also see how, by chaining a few commands together, we could easily put together a script that would list the top 10 directories by space usage. The command we need to sort the output is of course the sort command.
Because MacOS’s version of sort can’t handle du’s human readable output, I used the -m option for du to display disk usage in megabytes (use the -g or -k option to display in gigabytes or kilobytes). The -n and -r options for sort sort the output numerically and in reverse order, so the largest directories will appear at the top of the list.
Superusers, su, and sudo
A number of commands relate to system administration. Try typing man -s 8 intro for an introduction to them. I’m going to give you the one essential command for system administration here: su. This stands for “super user” and refers to the administrative user or root account. All files belonging to the system are owned by this user, and you'll need to become this user to perform administration.
A related command, sudo, allows you to become the super user for a single command. Why use sudo instead of su? Because best practice dictates that you not run around as the root user, with the power to do irreparable harm by accident. You'll always want to do everything you possibly can as a normal user and become a super user only when you need to. Exactly how you gain super user privileges will depend on your Unix distribution. Let’s see how su works on MacOS:
 IDG
IDGHuh? I'm sure I typed the password correctly. What has happened here is that my current user, nunez, does not have permission to su. On some Unixes this means the user needs to be in the wheel group, and on other systems (including MacOS) the user needs to be in the sudoers file.
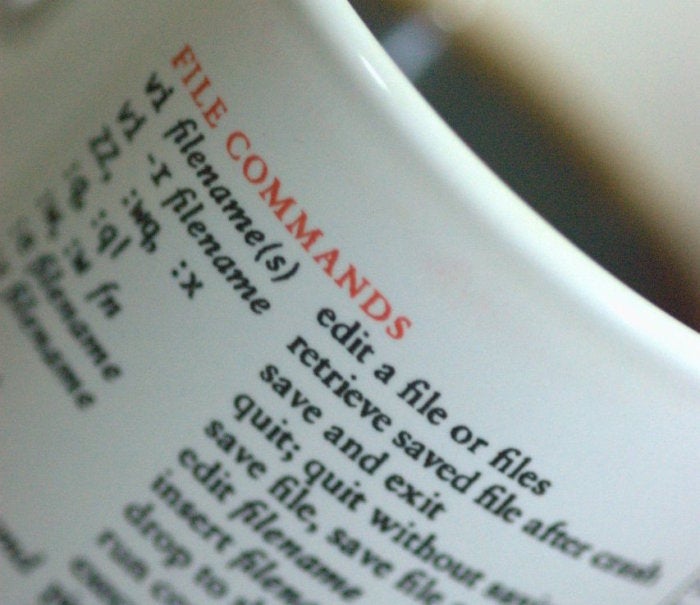
Let’s finish up by adding nunez to sudoers, which will give you a taste of editing files on the command line. Power users sing the praises of the Emacs and Vi editors, and I encourage you to try them, but we’ll use Nano here. Nano is easy to learn and use, and MacOS and many Linux distros come with it already installed.
Naturally, adding a user to the sudoers file requires root privileges. I’ll need to log out of my nunez account and log into my administrator account. Then if I run sudo nano /etc/sudoers at the command line, Nano will open the sudoers file in the terminal window, ready for editing:
 IDG
IDG